Your cart is currently empty.
General Instructions for O’verlays®
Prepping your O’verlays
- Remove the O’verlays from the packaging materials.
- Use fine sandpaper or an emery board to lightly sand any rough edges.
- Wipe the O’verlays with a small brush or a clean cloth to remove any dust then wipe with isopropyl alcohol to remove any residue prior to painting.
- Paint general instruction
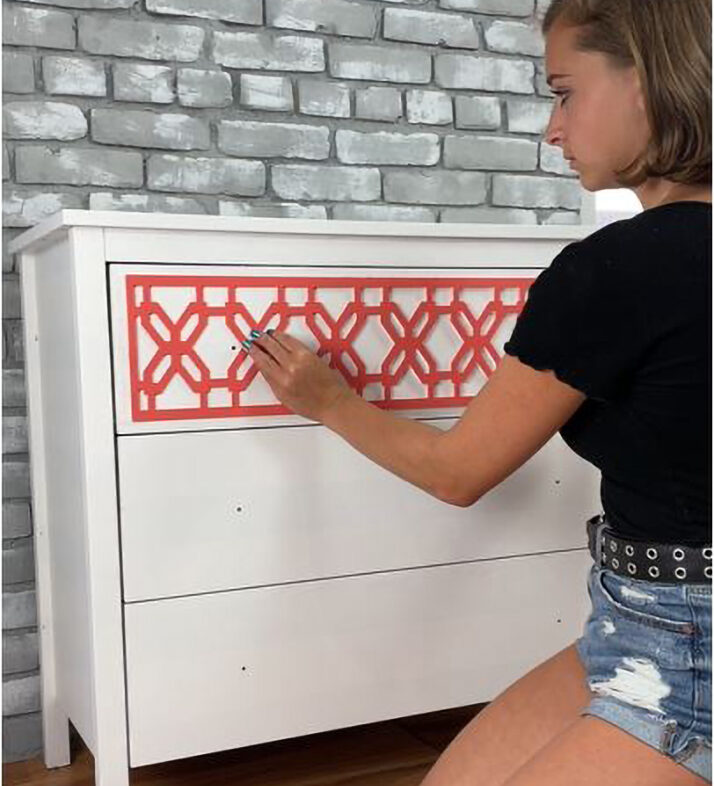
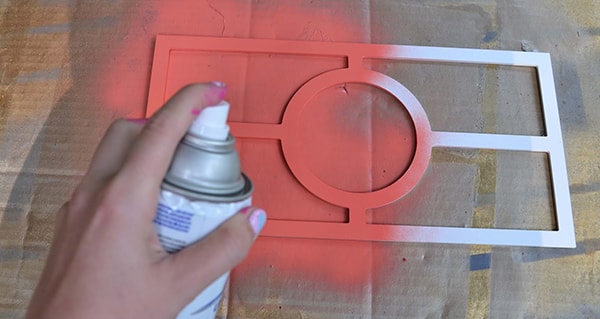
- O’verlays are white and can be used as is, but if you prefer they can be painted a different color.
- Overlays can be painted before or after they are adhered but if you are not planning on refinishing the entire piece of furniture or surface it is recommended to paint the overlays before you adhere them.
- Paint O’verlays on a flat surface as this will prevent the paint from forming drip marks.
- Do not paint O’verlays in the hot sun or extreme heat because the high heat will cause the panels to warp.
- O’verlays do not require a primer but if you decide to use one be sure it is fully dried before applying the color coat. If not the color coat will bubble up off the overlay.
- Use a small roller if you are using canned paint as it works well for a smooth application.
- Please follow all instructions according to the manufacturer of the paint you are applying.
- It is recommended to paint the backsides of the O’verlays if they are being used on glass or mirror where the reverse side will be visible.
- The following paint will adhere nicely to Overlays
- Spray paints for plastic such as Rust oleum
- Interior paints such as Behr, Ben Moore, Sherwin Williams
- Chalk paints, mineral paints
- Faux finishing paints such as Modern Masters
- Gel Stains when used with a base coat
- OIL BASED PAINTS are not recommended unless it is being applied by a professional painter.
- Glue general instruction
- Your choice of adhesive will depend on the surface you are applying the overlay to.
- Use liquid adhesive sparingly so the excess does not squeeze out onto the edges of the panel and the surface it is being applied to.
- If the overlays are being installed in an area where the panels will need extra security, for example on a wall or ceiling, please seek professional advice or installation.
- Types of adhesives to use
- Liquid Nails 100% clear Silicone for small projects adhesive
- Industrial strength double sided tape
- Permanent bond Glue Dots
- Industrial strength double sided silicone tape
- Window mullion clips, frame clips
- Use liquid adhesives that will bond to vinyl or plastic and the surface you are applying the overlay to.
- Trimming O’verlays
- O’verlays can be trimmed by using a utility knife with a new blade and a straight edge. Continuously score until you have cut through. Rough edges can be sanded by using a small piece of fine sandpaper or an emery board.
Disclaimer
O’verlays® is a product manufactured in the USA. There is no guarantee of warranty expressed or implied for the use of this product. Caution this product could shatter if bent or dropped. Please use caution if there are sharp edges. Test any paint or adhesive you are thinking of using on the product and on the item you are attaching it to. Do not screw directly into the O’verlays, drill holes as needed prior to using screws. We will not be held responsible for any misuse or other creative alterations other than given in the instructions of this product.
All of the designs of O’verlays® have a Registered Trademark and are copyright protected for Danika & Cheryle LLC.